
 In this article we will go over the steps that are needed to register our local Hyper-V Server to a different Azure Migration project, and how to clean up existing project.
One of the first steps in our Azure Migration project is to do the assessments of our current on-premises environment to get a better idea of what migration is supported and how much it is going to cost. If we decide to use Microsoft tools for this, this is also the time when we will create our first Azure Migration project in Azure Portal and install local appliance. However, it can take a lot of time until the migration project is completed and trial version of Windows Server for the appliance can expire. We might as well decide that we want to move resources to a different region, subscription or tenant. This means that we need to reregister our already registered Hyper-V Server to a different Azure Migration project.
Deleting the old Azure Migration Project
As you know, each Azure Migration need to be part of a project. But we don’t always necessarily need to delete the old Azure Migrate project. Sometimes we need to do a cleanup after successful migration, or before creating a new project to replace the original one. There is no obvious delete button in Azure Portal for that, so here is what you need to do:
Locate the Resource Group where the project is located. If you don’t know where you project is, go to the Azure Migrate, and click on the project name. From there you will find the Subscription and the Resource Group.
Now go to the Resource Group and click “Show hidden types”.
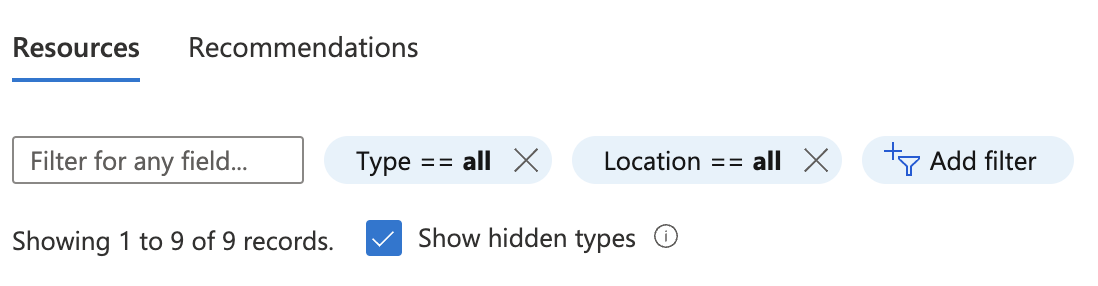
In here you will see resources such as microsoft.migrate/migrateprojects but also resources representing Assessments, Sites, Appliances, Key Vaults, Storage accounts. In case you need to delete the project, you can delete all of it.
Cleaning up old configuration from Hyper-V Hosts
If you are done with your migration project, you should also clean the configuration from the hosts. This step is optional in case you are going to reregister your servers to a new project.
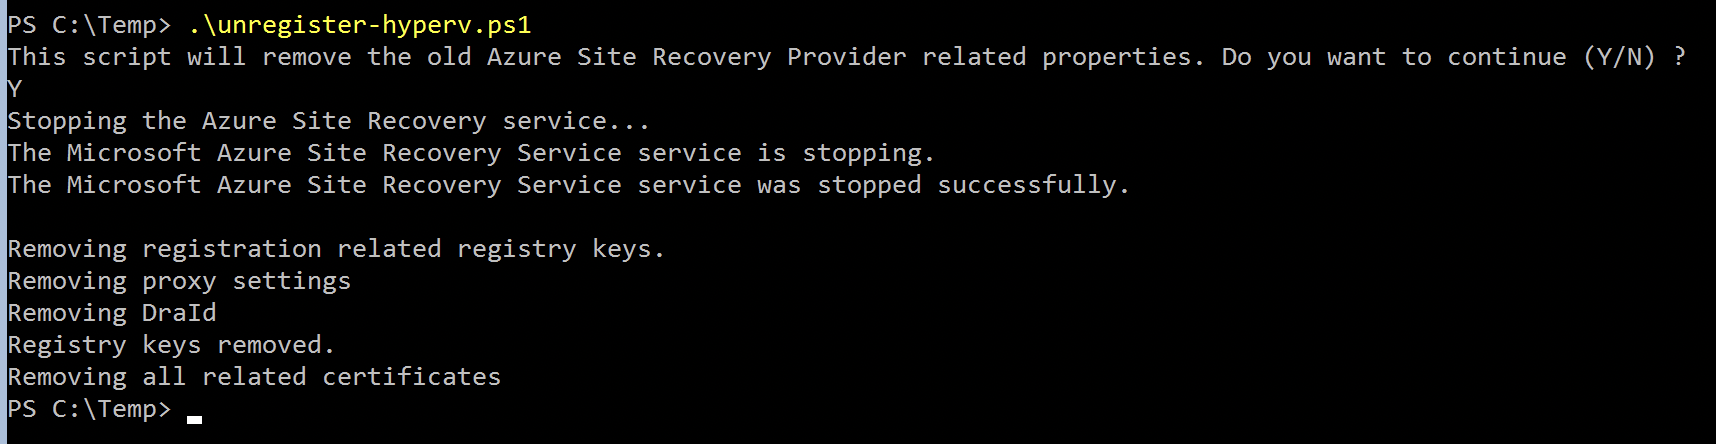
This settings is same for Azure Migrate and Azure Site Recovery, and it is saved in the System Registry, under the HKEY_LOCAL_MACHINE\SOFTWARE\Microsoft\Azure Site Recovery\Registration. You can remove that key manually, or use this simple PowerShell script for the complete cleanup:
1
2
3
4
5
6
7
8
9
10
11
12
13
14
15
16
17
18
19
20
21
22
23
24
25
26
27
28
29
30
31
32
33
34
35
36
37
38
39
40
41
42
43
44
45
46
47
48
49
50
51
52
53
54
55
56
57
58
59
60
61
62
63
64
65
66
67
68
69
70
71
72
73
74
75
76
77
78
79
80
81
82
83
84
85
86
87
  pushd .
  try
  {
      $windowsIdentity=[System.Security.Principal.WindowsIdentity]::GetCurrent()
      $principal=new-object System.Security.Principal.WindowsPrincipal($windowsIdentity)
      $administrators=[System.Security.Principal.WindowsBuiltInRole]::Administrator
      $isAdmin=$principal.IsInRole($administrators)
      if (!$isAdmin)
      {
          "Please run the script as an administrator in elevated mode."
          $choice = Read-Host
          return;
      }

      $error.Clear()
      "This script will remove the old Azure Site Recovery Provider related properties. Do you want to continue (Y/N) ?"
      $choice =  Read-Host

      if (!($choice -eq 'Y' -or $choice -eq 'y'))
      {
      "Stopping cleanup."
      return;
      }

      $serviceName = "dra"
      $service = Get-Service -Name $serviceName
      if ($service.Status -eq "Running")
      {
          "Stopping the Azure Site Recovery service..."
          net stop $serviceName
      }

      $asrHivePath = "HKLM:\SOFTWARE\Microsoft\Azure Site Recovery"
      $registrationPath = $asrHivePath + '\Registration'
      $proxySettingsPath = $asrHivePath + '\ProxySettings'
      $draIdvalue = 'DraID'
      $idMgmtCloudContainerId='IdMgmtCloudContainerId'


      if (Test-Path $asrHivePath)
      {
          if (Test-Path $registrationPath)
          {
              "Removing registration related registry keys."
              Remove-Item -Recurse -Path $registrationPath
          }

          if (Test-Path $proxySettingsPath)
          {
              "Removing proxy settings"
              Remove-Item -Recurse -Path $proxySettingsPath
          }

          $regNode = Get-ItemProperty -Path $asrHivePath
          if($regNode.DraID -ne $null)
          {
              "Removing DraId"
              Remove-ItemProperty -Path $asrHivePath -Name $draIdValue
          }
          if($regNode.IdMgmtCloudContainerId -ne $null)
          {
              "Removing IdMgmtCloudContainerId"
              Remove-ItemProperty -Path $asrHivePath -Name $idMgmtCloudContainerId
          }
          "Registry keys removed."
      }

      # First retrieve all the certificates to be deleted
      $ASRcerts = Get-ChildItem -Path cert:\localmachine\my | where-object {$_.friendlyname.startswith('ASR_SRSAUTH_CERT_KEY_CONTAINER') -or $_.friendlyname.startswith('ASR_HYPER_V_HOST_CERT_KEY_CONTAINER')}
      # Open a cert store object
      $store = New-Object System.Security.Cryptography.X509Certificates.X509Store("My","LocalMachine")
      $store.Open('ReadWrite')
      # Delete the certs
      "Removing all related certificates"
      foreach ($cert in $ASRcerts)
      {
          $store.Remove($cert)
      }
  }catch
  {
      [system.exception]
      Write-Host "Error occurred" -ForegroundColor "Red"
      $error[0]
      Write-Host "FAILED" -ForegroundColor "Red"
  }
  popd
Registering Hyper-V Servers with new Azure Migrate Project
If you are going to use Microsoft Azure Migrate as a replication tool, now that we got rid of the old project or simply created a new one, we need to reregister our Hyper-V hosts and associate them with this new project. This same procedure need to be performed when moving Azure Site Recovery target Recovery Services Vault.
In the Migration Tools section, click on Replicate and start adding new servers. This will prompt you to download the installer for the Microsoft Azure Site Recovery Provider and the registration key. You need to distribute that directly to your servers or to a centrally available network location.
In case you are not on the newest version already, you can now run the Microsoft Azure Site Recovery Provider installer you downloaded earlier and perform in-place upgrade.
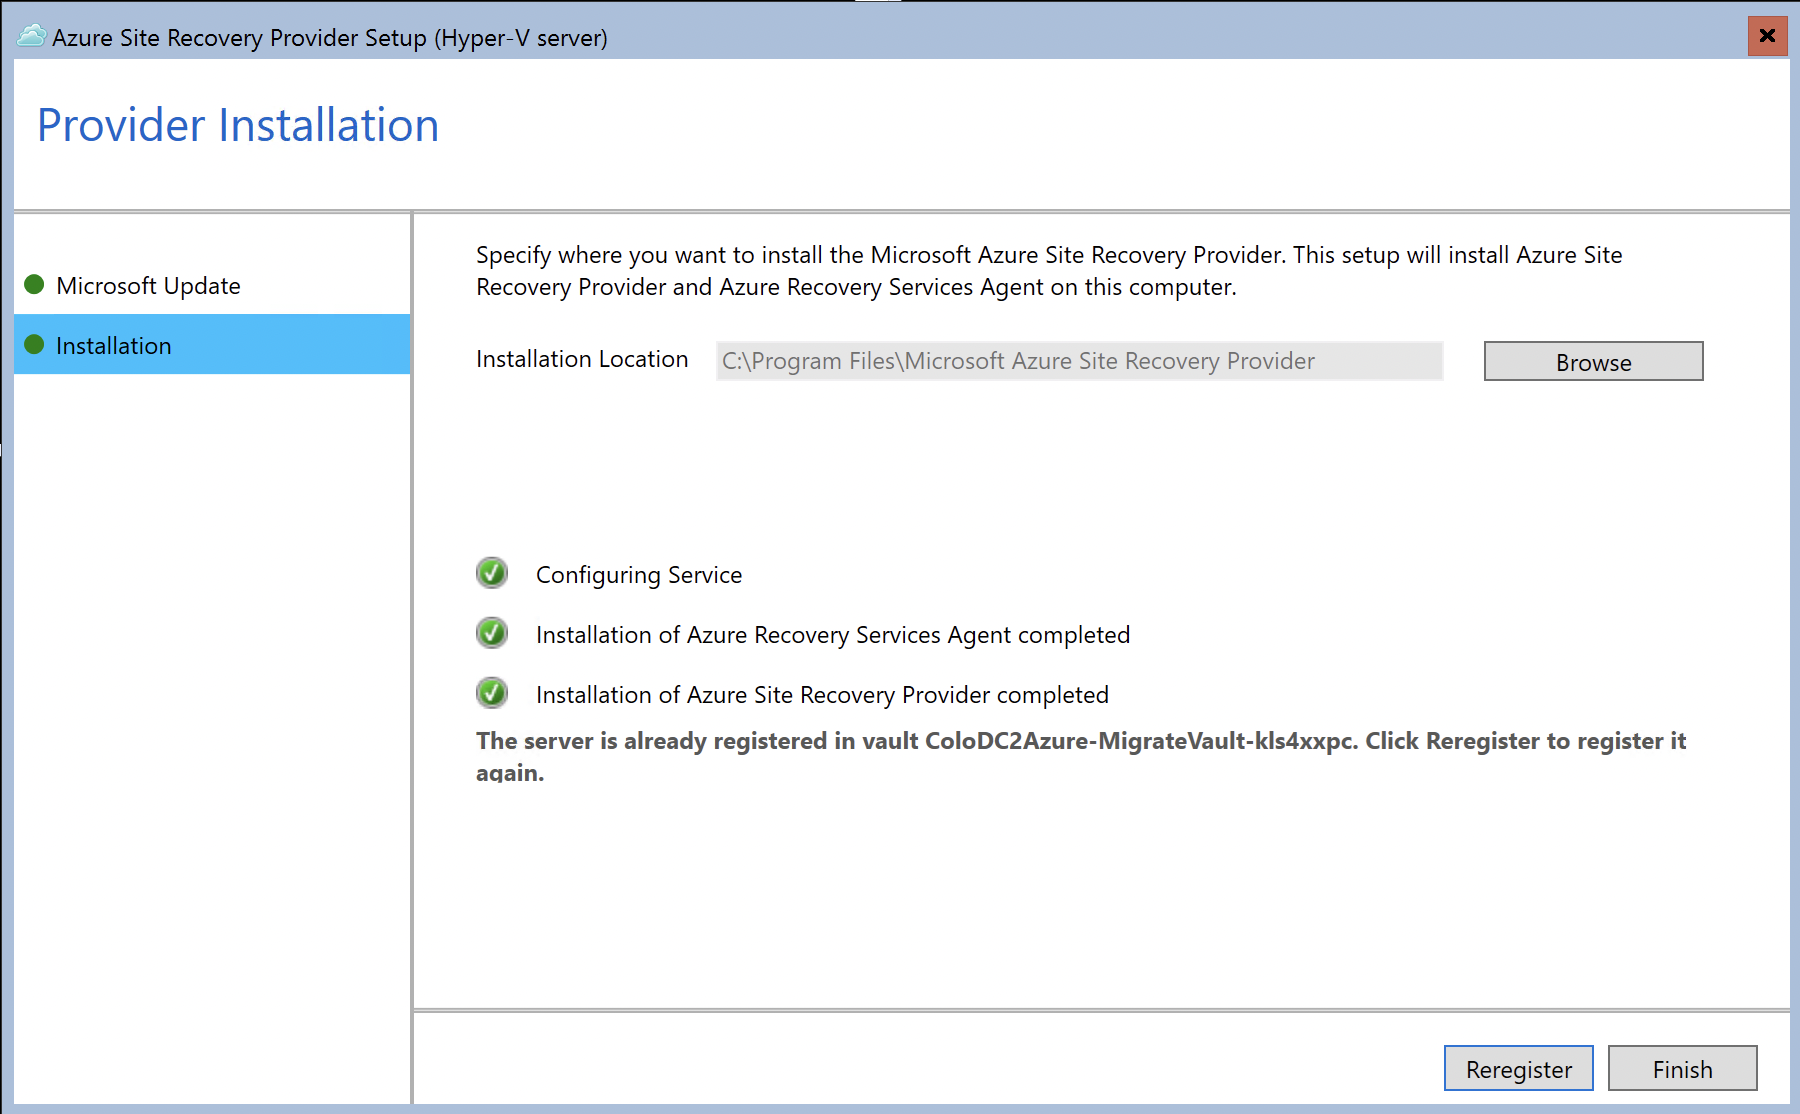
If you are not prompted at the end of the installation wizard, you can go to “C:\Program Files\Microsoft Azure Site Recovery Provider\” and run DRConfigurator.com. You will be asked to provide Friendly Name for your server, path to credentials file and configure Encryption and Proxy if needed.
Server Core
If you try to do this on Server Core, you will get the following Error Message:
Creating an instance of the COM component with CLSID * from the IClassFactory failed due to the following error 80040111 ClassFacotry cannot supply requested class (Exception from HRESULT: 0x80040111 (CLASS E_CLASSNOTAVAILABLE)).
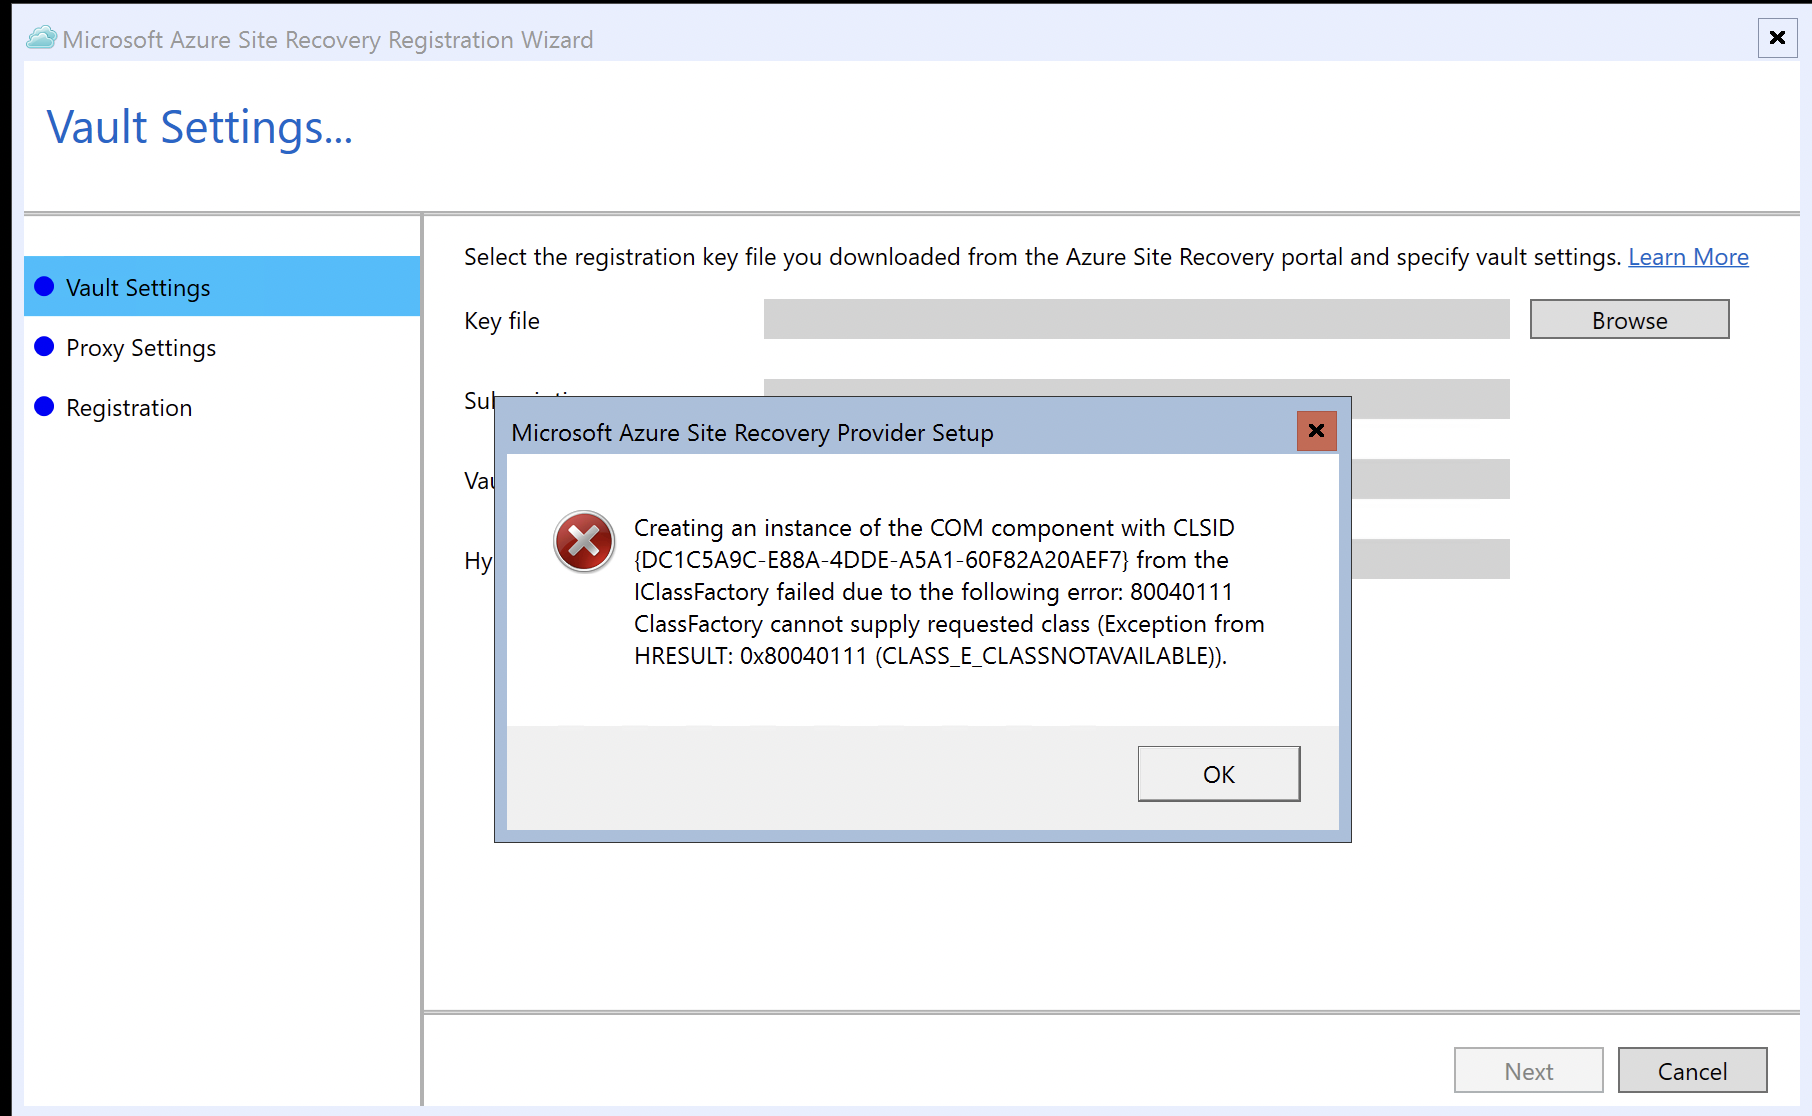
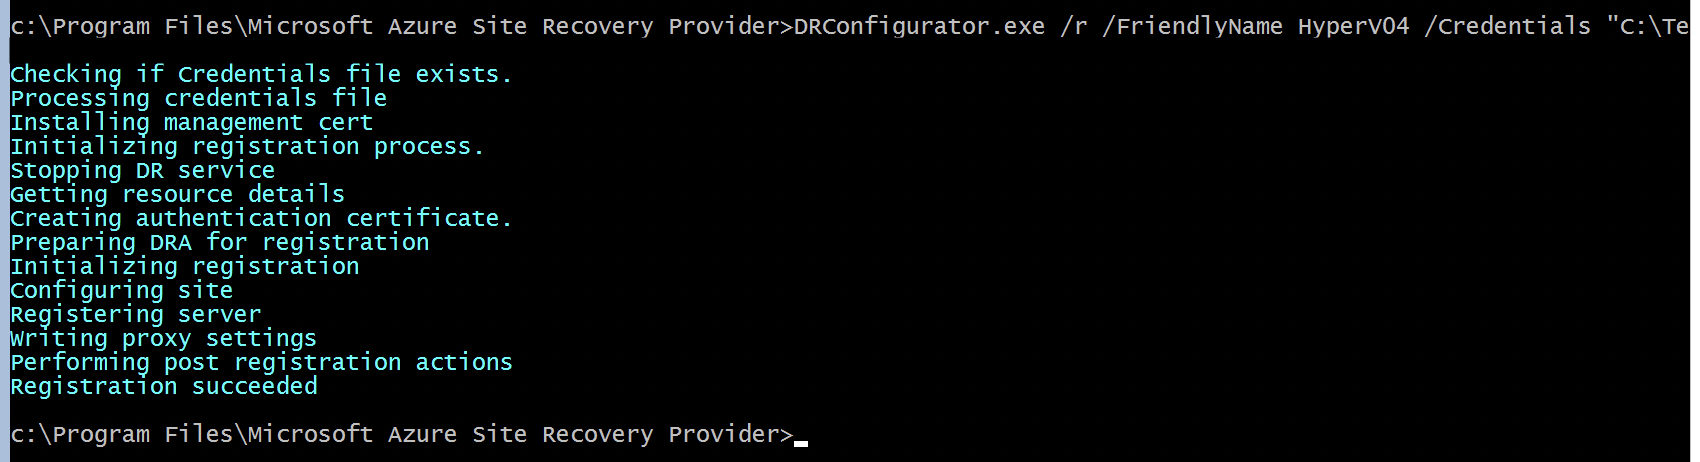
That is because certain classes are not available in Server Core edition and registration needs to be performed in the command line instead:
1
DRConfigurator.exe /r  /FriendlyName <friendly name of the server> /Credentials <path of the credentials file>
Here is the full list of parameters:
- /Credentials: Specify the location of the registration key you downloaded.
- /FriendlyName: Specify a name to identify the Hyper-V host server. This name will appear in the portal
- /EncryptionEnabled: Optional. Specify whether you want to encrypt replica virtual machines in Azure (at rest encryption).
- /proxyAddress; /proxyport; /proxyUsername; /proxyPassword: Optional. Specify proxy parameters if you want to use a custom proxy, or your existing proxy requires authentication.
After that, you can check if servers are showing up in the Infrastructure Servers section. As the final step, you need to finalize the registration by clicking the button. That can take up to 15 minutes and after that you should be able to start replicating the servers to Azure.
In case you have any questions, you can always DM me on Twitter or LinkedIn. Keep clouding around.
Vukašin Terzić